

Table of Contents
- Why Most Traders Use Too Many Indicators
- Moving Averages: The Backbone of Trend Analysis
- RSI: Reading Momentum Before the Crowd Panics
- MACD: Trend Direction Plus Momentum in One Window
- Bollinger Bands: Measuring Volatility, Not Direction
- VWAP: The Institutional Anchor for Intraday Price
- ATR: Turning Volatility Into Smarter Stops and Sizing
- How to Build a Non-Redundant Indicator Stack
- Common Mistakes That Sabotage Even Good Setups
- Frequently Asked Questions
- Conclusion
Why Most Traders Use Too Many Indicators
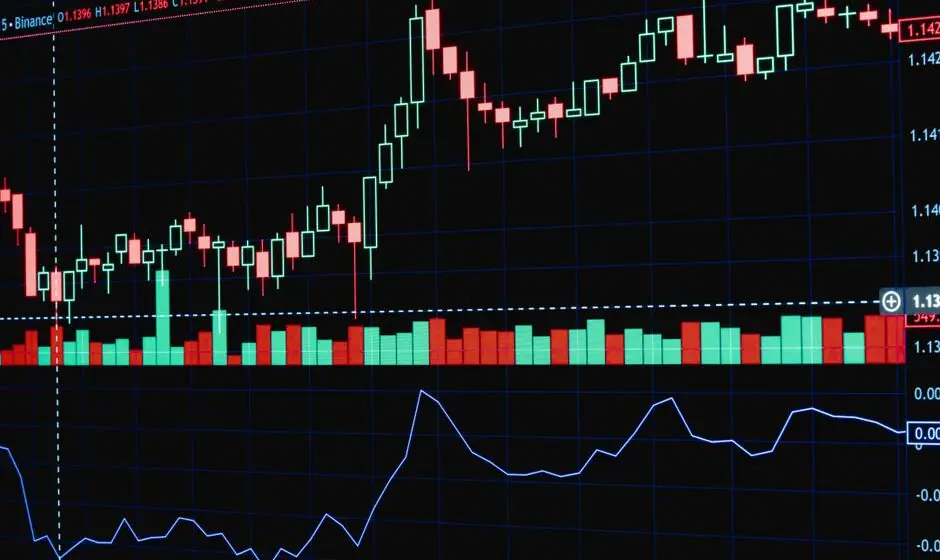
Open a charting platform with default settings and the screen fills immediately: an RSI, a MACD, two moving averages, a stochastic oscillator, possibly a stochastic RSI, a set of Bollinger Bands, and a volume histogram crammed into the lower panel. The screen looks busy, even professional. The trading, often, is not.
The top trading indicators are not the ones with the most parameters or the prettiest plots. They are the ones that tell you something the price chart alone cannot. A useful indicator either defines the trend, measures momentum, frames volatility, or anchors your execution to where the real money is positioned. Anything that duplicates one of those jobs is noise.
This matters now because 2024 and the early months of 2025 have produced sharp, fast rotations between the Nasdaq, small caps, and Treasuries. The S&P 500 has spent extended stretches in narrow ranges before breaking violently in one direction. In that environment, traders leaning on a single oscillator or a single moving average get run over. Those who layer one trend tool, one momentum tool, and one volatility tool, and who treat each as confirmation rather than as a signal, tend to survive the whipsaws.
This guide walks through the indicators worth learning first, explains what each one actually does, and shows how to combine a small number of them so they do not cancel each other out.
Moving Averages: The Backbone of Trend Analysis
A moving average smooths price into a single line so you can see direction without the static of daily noise. Two settings matter more than any others: the 50-day and the 200-day simple moving average (SMA). Most institutional desks and long-only managers track both as proxies for primary and secondary trend. When the broader market is in a confirmed uptrend, the slope and separation of these two lines is often the first filter a portfolio manager applies before approving a new long.
Moving Average Crossovers and the Golden/Death Cross
When the 50-day SMA crosses above the 200-day SMA, technicians call it a Golden Cross. When it crosses below, a Death Cross. These are not predictions. They are confirmations that a regime change may already be underway. By the time the cross prints, much of the move is behind you, which is why the signal works best as a filter rather than as an entry trigger.
On a 30-minute chart, the 9-period and 21-period exponential moving averages (EMAs) are more responsive. The 9/21 EMA cross is a staple of short-term trading because it reacts to momentum shifts within the trading day without becoming so fast that it whipsaws on every tick. Used together with structure — a pullback to a rising 9-EMA that also lines up with prior breakout levels — the cross becomes a higher-probability entry trigger rather than a blind signal.
> Key Takeaway
> Moving averages tell you what trend is in force. They are not buy or sell signals on their own.
A simple rule: trade with the slope of the higher timeframe moving average, then use the lower timeframe cross to time entries.
RSI: Reading Momentum Before the Crowd Panics
The Relative Strength Index (RSI) is a bounded momentum oscillator that moves between 0 and 100. Readings above 70 are labeled “overbought” and readings below 30 are labeled “oversold.” Those labels are the most misunderstood concept in technical analysis. Overbought does not mean sell. In strong uptrends, RSI can stay above 70 for weeks. What it really signals is that the recent move is mature and that the rate of change is decelerating. A momentum extreme is a condition, not a conclusion.
RSI Divergence and Overbought/Oversold Thresholds
The signal worth respecting is divergence. Bullish divergence forms when price prints a lower low while RSI prints a higher low, suggesting that sellers are losing steam. Bearish divergence forms when price prints a higher high while RSI prints a lower high, suggesting that buyers are running out of fuel. Both forms of divergence work best when they appear at a structurally important level on the chart — prior support, a trendline, or a moving average — rather than in the middle of nowhere.
Consider a real setup from late 2024 on TSLA. The stock had pushed above the $260 region in a near-parabolic move that pulled in momentum chasers. Price then printed a new local high, while the daily RSI quietly printed a lower high. That classic bearish divergence foreshadowed a sharp pullback, with the stock eventually rotating back to its 50-day moving average before basing. A trader who recognized the divergence could have tightened stops, trimmed longs, or set up a short against resistance. One who only watched the 70 line would have been stopped out multiple times on the way up.
RSI works best on daily and 4-hour charts. On 1-minute charts, it generates so many false signals that it becomes a liability rather than a tool.
MACD: Trend Direction Plus Momentum in One Window
The Moving Average Convergence Divergence (MACD) packages trend and momentum into a single sub-chart. It plots the difference between a 12-period and 26-period EMA (the MACD line), a 9-period EMA of that difference (the signal line), and a histogram showing the gap between the two. Because both EMAs react to recent price, the indicator is more responsive than a pair of simple moving averages and is well suited to swing trading on daily and 4-hour timeframes.
MACD Histogram and Signal Line Mechanics
The most useful component is the histogram. When the histogram is positive and expanding, momentum is accelerating in the direction of the trend. When the histogram is positive but contracting, the trend is still up but losing steam. A flip from positive to negative often marks the first sign of a momentum shift, frequently before price itself has rolled over.
Signal line crossovers — where the MACD line crosses above or below the signal line — are the entries most retail traders learn first. They work, but late. A more disciplined approach is to use the histogram as an early warning and only act on the signal line cross when it aligns with the prevailing trend on the higher timeframe. A daily MACD bullish cross in the middle of a weekly downtrend is a counter-trend bounce candidate at best.
A textbook example played out on NVDA in early 2024. After several weeks of consolidation, the stock compressed inside the Bollinger Bands while the MACD histogram printed a series of higher lows beneath the zero line, an early hint that selling pressure was drying up. When the MACD line crossed above the signal line and price broke above the consolidation range, the setup was complete. Traders who combined the MACD cross with the Bollinger Band breakout had a tighter, more confident entry than those using either tool alone.
Bollinger Bands: Measuring Volatility, Not Direction
Bollinger Bands plot a 20-period simple moving average with upper and lower bands set two standard deviations away. Because standard deviation expands when price moves fast and contracts when price goes quiet, the bands are a real-time measure of volatility. They tell you how much the market is breathing, not which way it is leaning.
Bollinger Band Squeeze and Volatility Breakouts
The Bollinger Band squeeze happens when the upper and lower bands contract toward the moving average. This reflects a market that is coiled. Squeezes are not signals to buy or sell. They are warnings that a large move is approaching and that you should stop trading mean reversion and start waiting for a breakout. Squeezes that follow a sustained trend on the higher timeframe tend to resolve in the direction of that trend; squeezes that appear in a range often resolve in the direction of the eventual catalyst, which is why patience matters.
The trade comes when one of the bands expands aggressively in the direction of the prior trend, ideally after price closes outside the opposite band. The earlier NVDA example illustrates the principle: a long squeeze resolved with a band expansion to the upside that coincided with a MACD bullish cross, giving a confluence-based entry.
Where Bollinger Bands fail is in chop. In a sideways market, repeated tag-the-band-and-fade setups lure traders in until a real breakout punishes them. The fix is straightforward: do not fade the bands when the higher timeframe trend is also flat. Wait for the squeeze, then trade the breakout.
VWAP: The Institutional Anchor for Intraday Price
Volume-Weighted Average Price (VWAP) is the average price of a security weighted by volume, calculated from the start of the trading session. It is one of the most-watched intraday reference points for desk traders and execution algorithms at firms running large orders. When a pension fund or a market maker fills a position, the trader is judged in part on how that fill compares to VWAP.
VWAP for Intraday Anchoring
VWAP works because institutions use it as a benchmark. A buy executed below VWAP is considered a good fill. A buy above VWAP is considered aggressive. That collective behavior makes VWAP a self-fulfilling support and resistance line within the session. A clean reclaim of VWAP on rising volume often marks the start of a sustained intraday trend; a rejection at VWAP with a return to the session low is a common end-of-day pattern.
In a high-volume morning session on ES (E-mini S&P 500) futures, a long entry anchored to a VWAP reclaim, with the 9/21 EMA confirming a bullish cross on the 5-minute chart, gives you a structured entry with a clear invalidation level: a sustained close back below VWAP. The target is typically the prior day’s high or the next overhead level, with a stop placed at a level that respects the morning’s average true range. The combination works because each tool answers a different question: VWAP tells you whether institutions are leaning long, the EMA cross tells you whether short-term momentum agrees, and ATR tells you how much room to give the trade.
VWAP is not useful on daily or weekly charts. Outside of intraday timeframes, the calculation loses its institutional relevance and behaves like an arbitrary average.
ATR: Turning Volatility Into Smarter Stops and Sizing
The Average True Range (ATR) measures how much an asset typically moves in a given period, expressed in price terms. A 14-period ATR on a daily chart of the S&P 500 will give you a number in index points. That number is the foundation of any serious stop-loss and position-sizing framework. Without it, every trade carries an unknown amount of risk relative to the noise of the underlying instrument.
ATR for Position Sizing and Stop Placement
Two applications matter most. First, stops. A stop placed at a fixed percentage or fixed dollar amount ignores the asset’s actual behavior. A $2 stop is meaningless on a stock that moves $10 a day, and excessive on a stock that moves 30 cents. Setting a stop at 1.5x or 2x the 14-day ATR adapts the risk to current conditions. When ATR compresses, stops tighten; when ATR expands, stops widen, which is precisely the behavior you want.
Second, position sizing. Once you know the distance from entry to stop, you can size the position so that a loss equals a fixed fraction of account equity, often 0.5% to 1%. This converts ATR from a descriptive indicator into a risk management engine. The same ATR reading produces a smaller position in a high-priced, high-volatility name and a larger one in a low-priced, low-volatility name, so that the dollar risk per trade stays constant across the book.
The NVDA breakout example illustrates both. With ATR elevated around the breakout, placing a stop at 1.5x ATR below entry respected the day’s noise and gave the trade room to breathe. A tighter, percentage-based stop would have been clipped by routine volatility, turning a winning setup into a loser through no fault of the analysis.
How to Build a Non-Redundant Indicator Stack
The goal is not to find a magic combination. The goal is to cover the four jobs a chart can perform, using as few tools as possible. Each indicator in the stack should answer a different question, and the answers should be combined through explicit rules rather than visual judgment.
A comparison of the core indicators by function is below.
| Indicator | Primary Function | Best Timeframe | Typical Setting | Common Use |
|---|---|---|---|---|
| 50/200 SMA | Trend filter | Daily/Weekly | 50, 200 | Define primary trend, golden/death cross |
| 9/21 EMA | Short-term trend | 5m, 30m | 9, 21 | Time entries within the day |
| RSI | Momentum | Daily, 4H | 14 | Divergence, exhaustion |
| MACD | Trend + momentum | Daily, 4H | 12, 26, 9 | Histogram shifts, signal cross |
| Bollinger Bands | Volatility | Daily, 4H | 20, 2 | Squeeze detection, breakout context |
| VWAP | Execution reference | Intraday | Session-based | Intraday bias, reclaim trades |
| ATR | Volatility in points | Any | 14 | Stops, position sizing |
A reliable starter stack for swing traders:
– Trend: 50-day and 200-day SMA, or a 9/21 EMA cross on intraday charts.
– Momentum: RSI(14) for divergence and exhaustion signals.
– Volatility: Bollinger Bands(20, 2) for squeeze detection, ATR(14) for stops and sizing.
– Execution reference: VWAP for intraday entries and exits.
A reliable starter stack for day traders:
– Trend: 9/21 EMA on the 5-minute chart, anchored to the higher timeframe structure.
– Momentum: RSI(9) on the 1- or 5-minute chart for overextensions.
– Volatility: ATR(14) for stop placement and target projection.
– Execution reference: VWAP for direction bias and reclaims.
The test is simple. If you removed one of the four tools, would your decision-making meaningfully change? If not, the tool is redundant. Most traders end up cutting one or two indicators after this exercise, and their results usually improve. The remaining indicators also become easier to read because the chart is no longer fighting itself.
> Risk Warning
> Indicators describe what has happened and hint at probabilities. They do not predict the future, and they do not override news, earnings, or systemic liquidity events.
Common Mistakes That Sabotage Even Good Setups
Five recurring errors show up in nearly every losing trader’s chart:
1. Using the same indicator twice. Stacking RSI, stochastic, and CCI is one oscillator repeated three times. They all measure momentum and will rarely disagree. Pick one.
2. Ignoring the higher timeframe. A 5-minute bullish setup inside a daily downtrend is a counter-trend scalp at best. Align with the dominant timeframe.
3. Tightening stops during a breakout. A breakout that immediately retraces is normal. A stop placed inside the breakout’s average noise will be hit before the trade has room to develop.
4. Recalibrating mid-trade. Changing the indicator settings after taking a signal destroys the statistical edge of the original setup.
5. Treating indicator readings as targets instead of conditions. “RSI is at 72, time to sell” is a recipe for being run over. “RSI is showing bearish divergence against price, time to tighten stops” is a process.
Avoiding these mistakes matters more than finding a new indicator. The most advanced traders in the world, including the systematic desks running large books at firms reporting to the SEC and CFTC, often use a small handful of well-understood tools, applied consistently. Edge comes from discipline, not from a fuller screen.
Frequently Asked Questions
What are the most reliable trading indicators for stocks?
There is no single “most reliable” indicator, because reliability depends on timeframe, asset, and market regime. Historically, trend tools (moving averages), momentum tools (RSI, MACD), and volatility tools (Bollinger Bands, ATR) have been the most consistently useful when combined. The most reliable indicator is the one whose behavior you understand deeply enough to apply in context. A simple moving average used with disciplined rules will outperform an exotic oscillator used carelessly.
Which trading indicator is best for beginners?
Most educators start beginners on the 20/50-period moving average for trend, RSI(14) for momentum, and ATR(14) for stops. Those three cover the core jobs, are widely available, and don’t require a steep learning curve. Adding VWAP makes sense once intraday trading becomes the focus, and Bollinger Bands can be layered in once the trader is comfortable reading volatility regimes. The order of introduction matters less than the discipline of mastering each tool before adding the next.
How many indicators should a trader use on one chart?
Three to four is the practical ceiling for most traders, and even that is generous. A trend tool, a momentum tool, a volatility tool, and an execution reference are enough. More than that and the chart starts producing conflicting signals that paralyze decision-making. The best test is the redundancy test described above: if removing the indicator changes nothing, the indicator is decoration.
Do professional traders actually use technical indicators?
Many do, though the way they use them is different from retail. Prop firms, hedge funds, and execution algorithms at institutions like CME Group members frequently use moving averages, RSI, MACD, ATR, and VWAP as inputs to larger quantitative frameworks or as execution benchmarks rather than as standalone signals. Indicators inform the model; they don’t replace it. At the institutional level, the same indicator often serves a different purpose — VWAP, for example, is a benchmark for execution quality rather than a trade trigger.
Are trading indicators accurate for predicting the market?
Indicators measure the past and the present. They become useful when the behaviors they describe have a tendency to repeat, which is true often enough to build an edge but not always. Treating them as predictive guarantees is the fastest way to lose money. Treat them as probabilistic inputs and size accordingly. A high-probability setup still loses more often than most traders expect; the edge is in the aggregate, not in any single signal.
Can trading indicators work in sideways or range-bound markets?
Some do. RSI and Bollinger Bands are particularly useful in ranges because they highlight extremes and mean-reversion opportunities. Trend tools like moving averages and MACD, by contrast, generate false signals in ranges and should be de-emphasized. Adapting the indicator stack to the regime is part of the work, which is why many experienced traders keep two separate chart presets — one for trending markets and one for ranges — and switch between them as conditions evolve.
When should a trader turn off indicators altogether?
In the moments around scheduled high-impact events, such as central bank decisions from the Federal Reserve or the ECB, economic data releases, and earnings. Indicators compress and distort during event-driven repricing as liquidity providers pull back and order flow becomes one-sided. The right move is often to step aside, wait for the post-event range to form, then re-engage with the structure. Indicators are tools for normal conditions; the most volatile sessions of the quarter rarely behave normally.
Conclusion
The top trading indicators are not exotic. They are the handful of tools that, when used together, tell a coherent story: where the trend is, how strong the momentum is, how volatile the environment is, and where the institutional reference points lie. Most traders do not need a new indicator. They need a smaller, more deliberate set applied with consistent rules and disciplined risk.
A practical next step is to pick one indicator from each of the four categories outlined above, apply them to a single market you know well, and journal every signal for a month. Note the win rate, the average winner, the average loser, and especially the trades where the indicators disagreed with each other. After thirty sessions, the right stack for your style will reveal itself, and the indicators you don’t need will become obvious. The exercise is less about finding the perfect tool and more about building the muscle to act on a defined process.
Markets reward process, not prediction. Build the process, size the risk, and let the top trading indicators do the job they were designed for: turning noise into information you can act on.
—
This article is for educational purposes only and does not constitute investment advice. Trading and investing carry risk of loss; never invest more than you can afford to lose, and remember that no indicator or strategy guarantees returns.
Last reviewed: August 2026